Knowledge Base
- Home
- Knowledge Base
How to Configuration IVSEC NVR
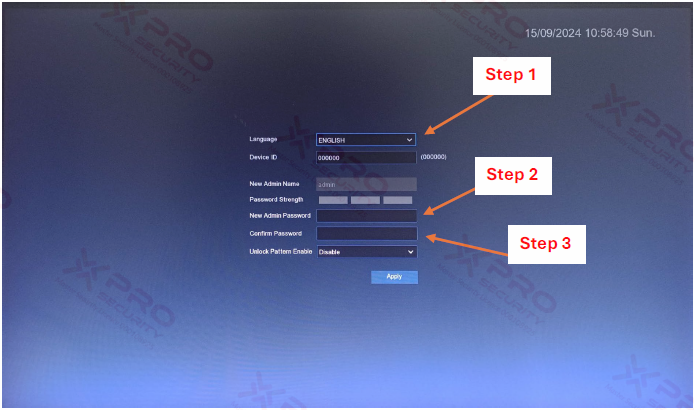
Step 1: Select "Language".
Step 2: Set the "New Admin Password".
Step 3: Confirmation of your password.
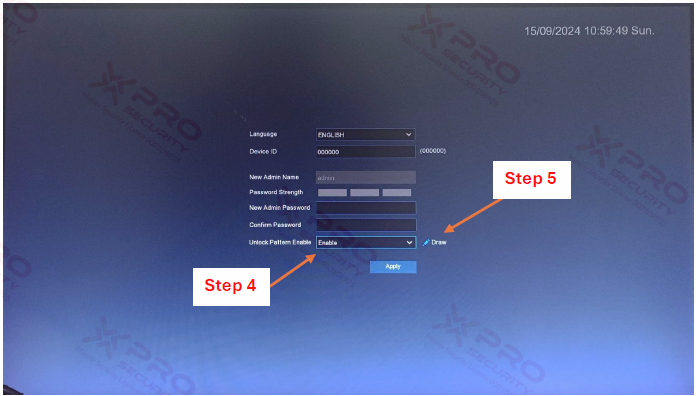
Step 4: For "Unlock Pattern Enable," select Enable.
Step 5: Select “Draw”.
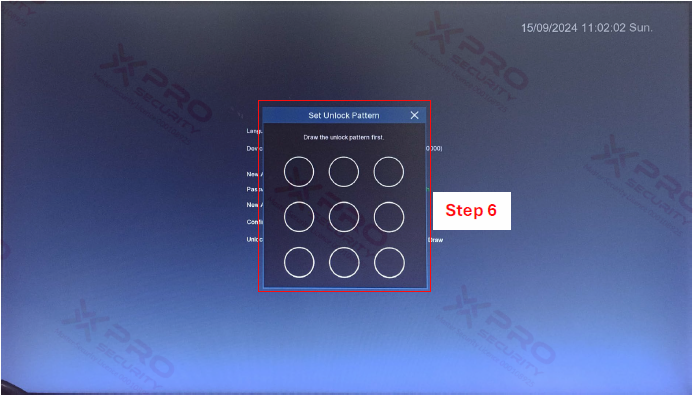
Step 6: Draw the pattern you want.

Step 7: Now, you are ready to draw a pattern for the login process.
Step 8: If you are logging in with a password, click the "Password" button.
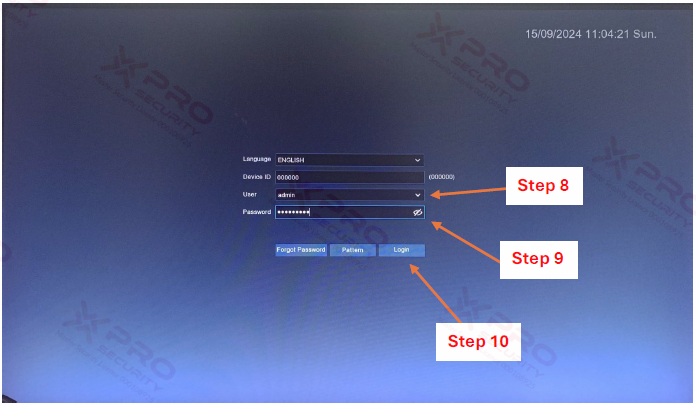
Step 8: Enter the user.
Step 9: Enter your password.
Step 10: Select “Login”.
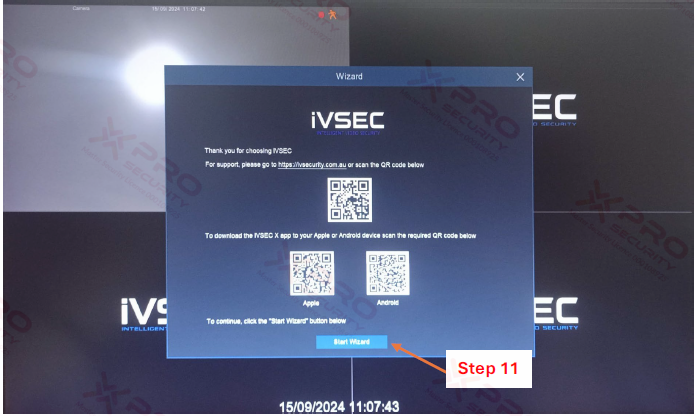
Step 11: Select “Start Wizard”.
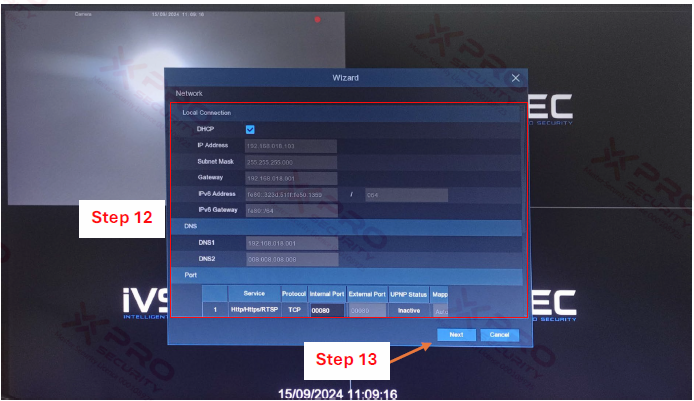
Step 12: Set the IP address.
Step 13: Select “Next”.
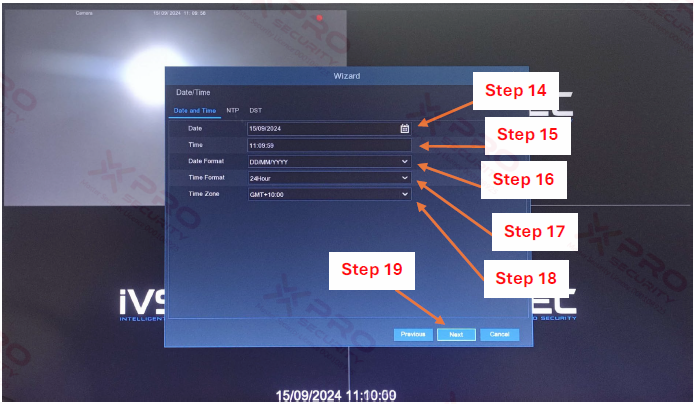
Step 14: Set the “Date”.
Step 15: Set the “Time”.
Step 16: Set the “Date Format”.
Step 17: Set the “Time Format’.
Step 18: Set the “Time Zone”.
Step 19: Select “Next”.
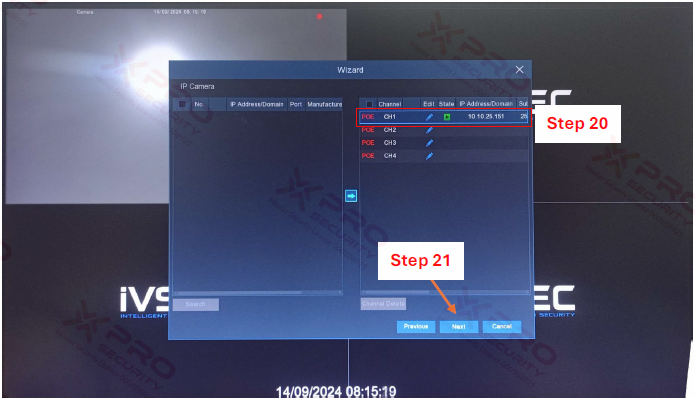
Step 20: You will be able to see that there is a camera connected to the NVR.
Step 21: Select “Next”.
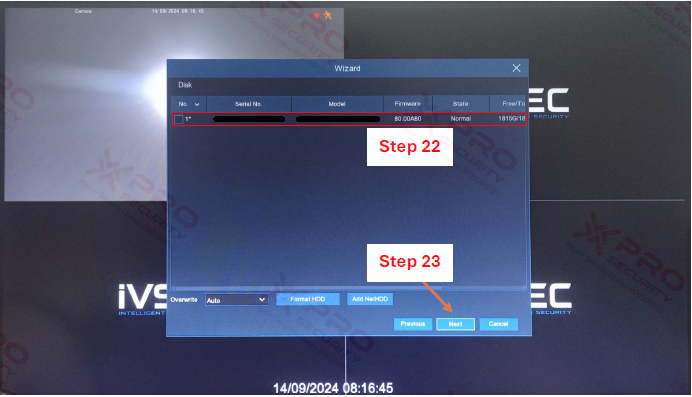
Step 22: You can see that a hard disk drive is connected to the NVR.
Step 23: Select “Next”.
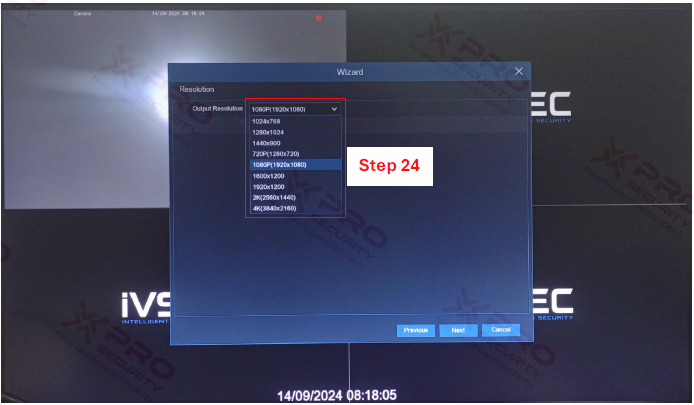
Step 24: You can select "Output Resolution".
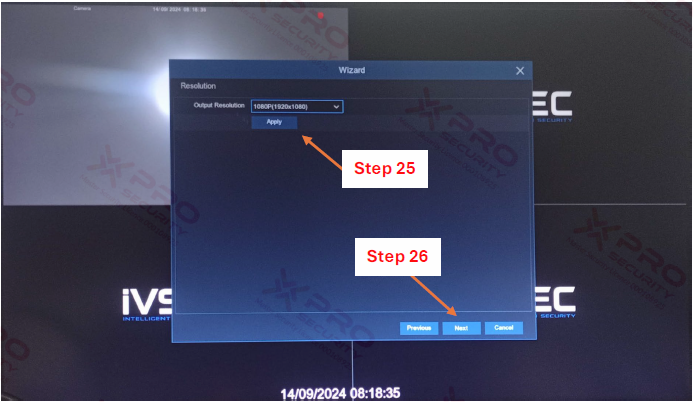
Step 25: Select “Apply”.
Step 26: Select “Next”.
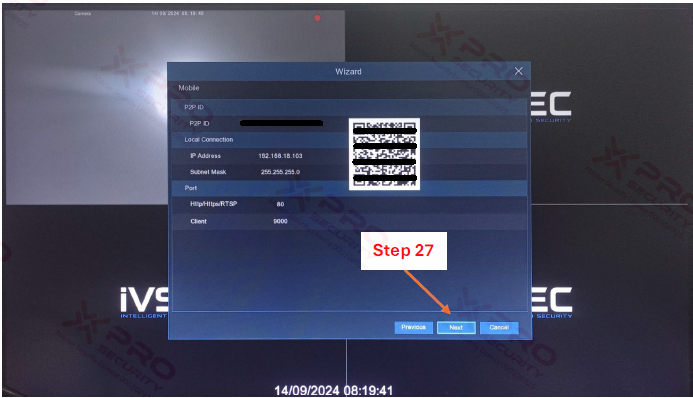
Step 27: Select “Next”.
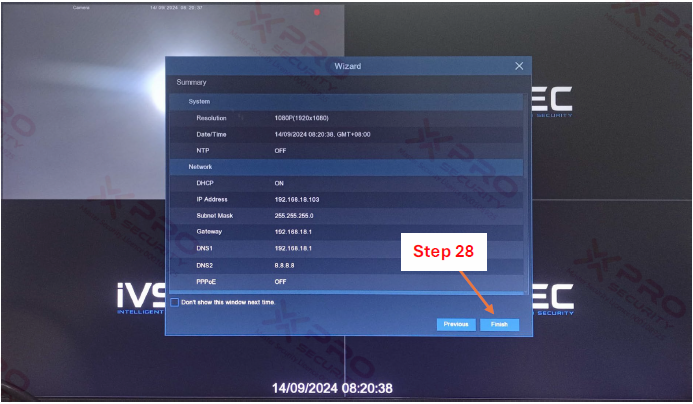
Step 28: Select “Finish”.

Step 29: The NVR has been successfully configured and the camera is now connected.
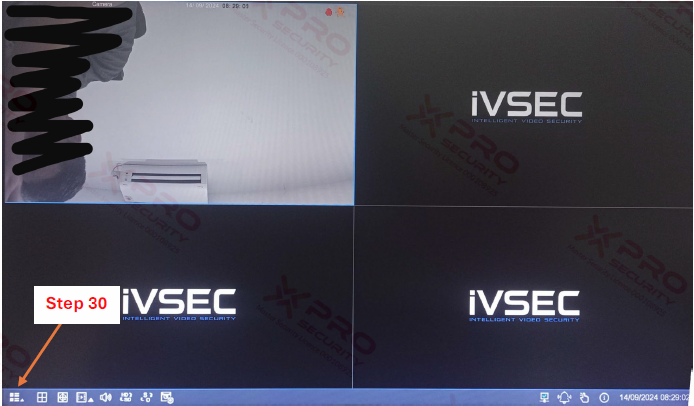
Step 30: You can add the NVR in IVSEC X Mobile App. Click the menu icon.
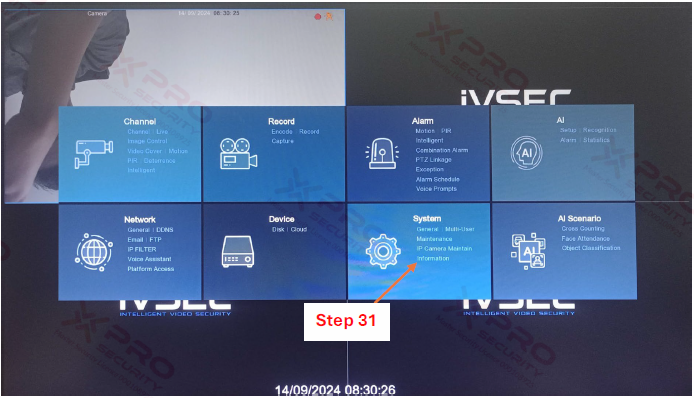
Step 31: Select “Information”".
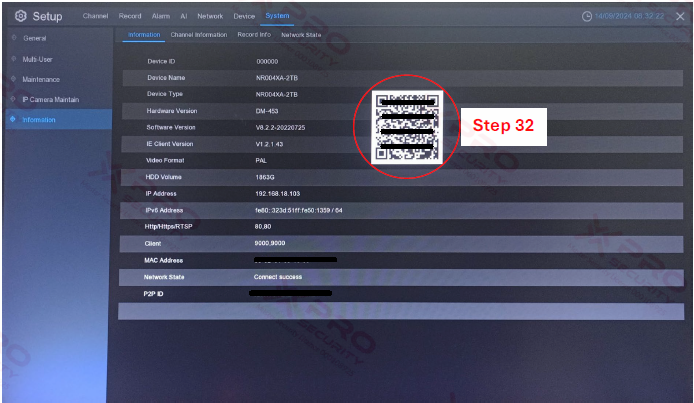
Step 32: Simply scan the QR code with the IVSEC Mobile App. The device will be added.
Contact Us Today For A Quote

Copyright © 2024 Xpro Group Pty Ltd TA/S Xpro Security